Dessert
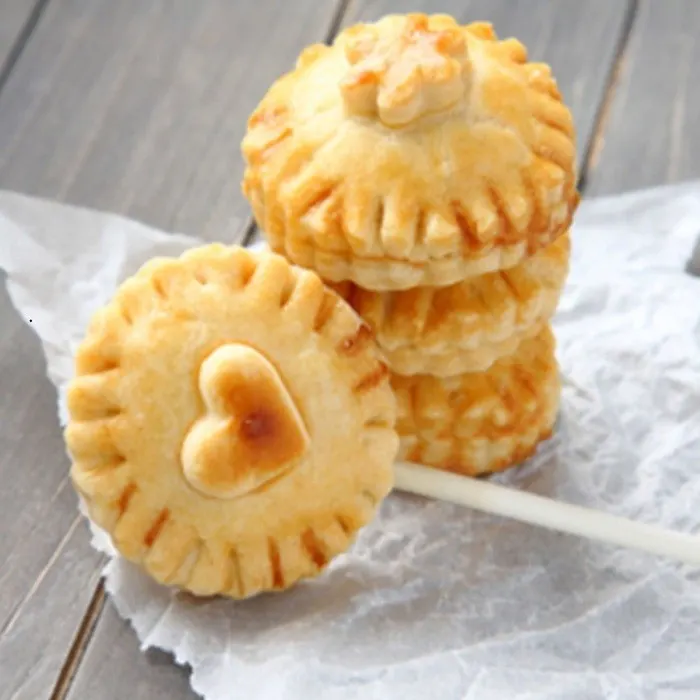
Apple pie pops
Ingredients
- Sugar1 tablespoon
- All purpose flour1 1/2 cups
- Salt1 tsp
- Unsalted Butter4 oz
- Shortening1 tablespoon
- Cold Water1/4 cup
- Apples1 lb
- Brown Sugar1/4 cup
- Cinnamon1 tsp
- Unsalted Butter3 tablespoons
- Ground Nutmeg1/2 tsp
- Salt1/2 tsp
- Lemon Juice3/4 teaspoon
- SugarTopping
- Egg1
- Water2 tsp
Instructions
- 1
Need Lollipop sticks
- 2
Instructions for crust Combine the flour, sugar, and salt to a food processor bowl.
- 3
Mix using the pulse setting.
- 4
Add butter and shortening and pulse about 10 -12 times until the texture is changed to small pebbles.
- 5
Add ¾ of the ice water and pulse a few more times until the dough takes the shape of a ball.
- 6
Add more water as needed.
- 7
Don't overmix.
- 8
Don't worry if the dough isn't completely blended.
- 9
You will use your rolling pin to finish creating the crust.
- 10
Place dough ball onto the counter and flatten into a flat disc.
- 11
Wrap it in plastic wrap and refrigerate for at least an hour or overnight.
- 12
Instructions for pie filling Heat butter over medium heat, until just golden brown Add brown sugar, spices, salt and lemon juice.
- 13
Stir to combine ingredients Add diced apples and stir.
- 14
Allow apples to cook for about 5-7 minutes, over medium heat Remove from heat and let the apple mixture cool.
- 15
You can place apples in the refrigerator to speed up the process.
- 16
Mix egg and water for an egg wash.
- 17
Roll out pie dough to 1/8 inch thickness.
- 18
Cut out rounds of 2 ½ to 3 inches and place them on parchment paper.
- 19
You will need to roll out the extra dough left over scraps from cutting.
- 20
In half of the rounds, cut out shapes or holes for ventilation purposes On the other half of the rounds, gently press one lollipop stick about halfway up each round.
- 21
Place one tablespoon of apple mixture in the center of each round.
- 22
Place each round on top of apples seal the edges.
- 23
Brush each pie pop with egg wash and sprinkle sugar on top.
- 24
Bake 15-20 minutes or until golden brown.
- 25
Enjoy!
Nutrition
Nutrition info for this recipe is coming soon.